This tutorial shows you how to build an awesome One Page WordPress Website using the new WordPress Block Builder Editor.
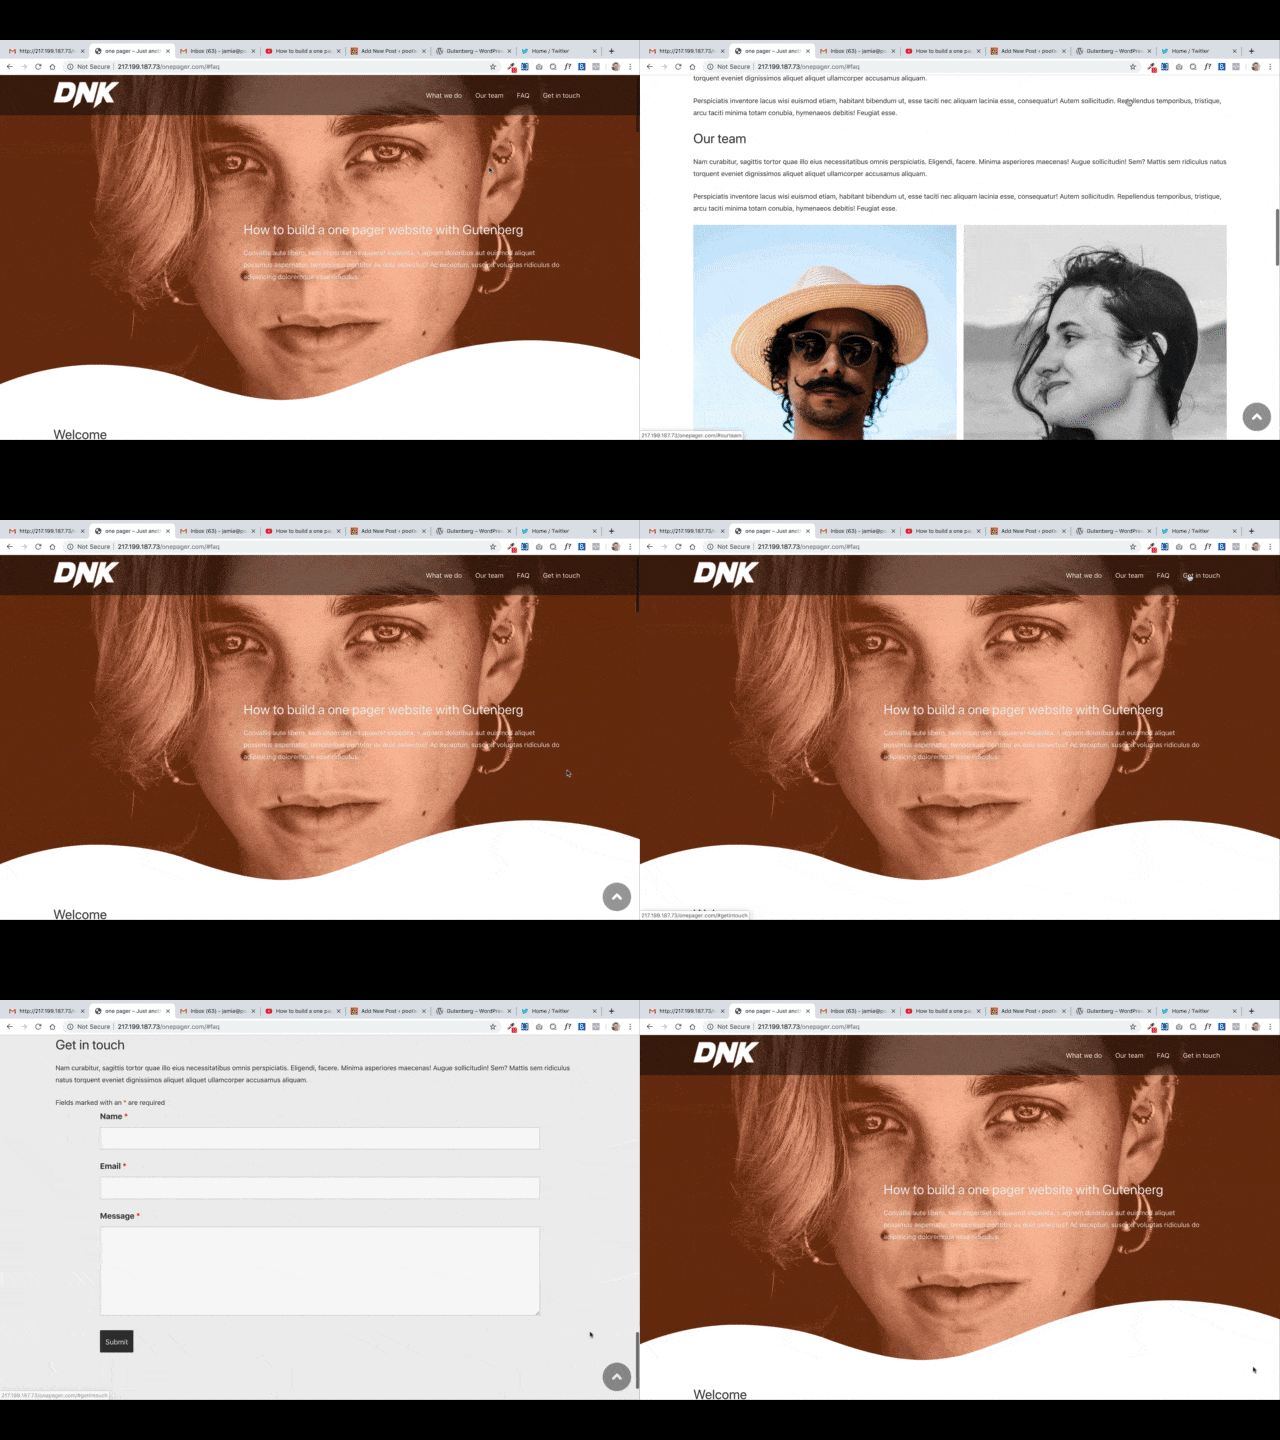
If you would like to see a live example of what you will learn, click here to see an awesome one page website that only took 30 minutes to build using just the WordPress Block Builder and some free 3rd Party plugins.
In my tutorial I used the Astra Theme, however this technique will work on any WordPress theme.
One Page WordPress Website tutorial – what you will learn
- How to create a smooth scrolling One Pager WordPress website in just 30 minutes
- How to add HTML anchors within your 1 page without having to learn any code
- How to link to sections within your WordPress pages from your menus
- How to create a smooth scrolling effect from your WordPress menu items
- The best 3rd Party WordPress plugins to use to build a One Page website
- How to add an up arrow in the footer so your users can easily scroll back to the top of your website
Quick links – One Pager + Gutenberg tutorial
- Video tutorial
- Step by step instructions
- What WordPress plugins I used
- How to set up HTML Anchor points (without writing any HTML)
- Using Gutenberg to build your sections
- How to set up your menu links (so that when you click on them you scroll to the Anchor)
One Page WordPress website example
Here’s what my One Page WordPress website tutorial will show you how to build (in just 30 minutes)
One Page WordPress Website Video Tutorial
Here’s a video tutorial I put together that shows you step by step how to build your One Page Website with the new WordPress Gutenberg Editor.
How to build a One Page website with the new Gutenberg Block Editor – step by step instructions
Step 1 – Install the following plugins
Here’s a list of the plugins I used in the Tutorial.
These are all free and can be download from wordpress.org/plugins
Caxton – https://wordpress.org/plugins/caxton/
CoBlocks – https://wordpress.org/plugins/coblocks/
Gutenberg – https://en-gb.wordpress.org/plugins/g…
Instant Images – https://wordpress.org/plugins/instant…
Ninja Forms – https://en-gb.wordpress.org/plugins/n…
Page Scroll to ID – https://en-gb.wordpress.org/plugins/p…
Ultimate Addons for Gutenberg – https://wordpress.org/plugins/ultimat…https://en-gb.wordpress.org/plugins/w…
Step 2 – Create your page and add your HTML anchor points within your page (don’t worry this doesn’t require any knowledge of code or HTML)
Create your page using Gutenberg.
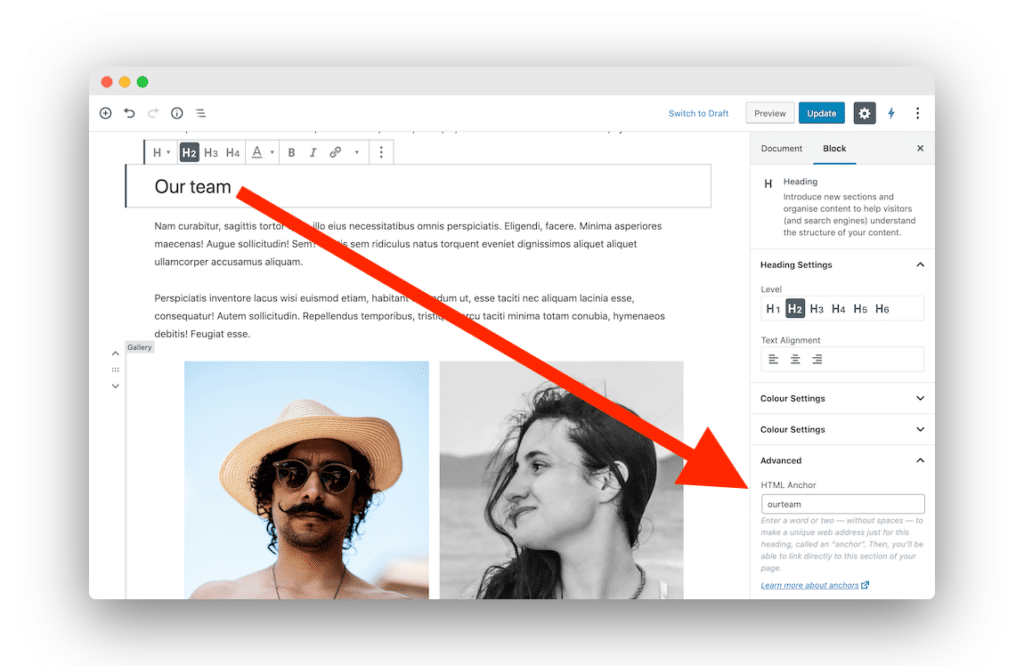
A great new feature in the Gutenberg Editor is the ability to add Anchor Points to Headings.
The most important thing is to add Headings and then add your Anchor Points for each heading.
The picture below shows you where you do this.
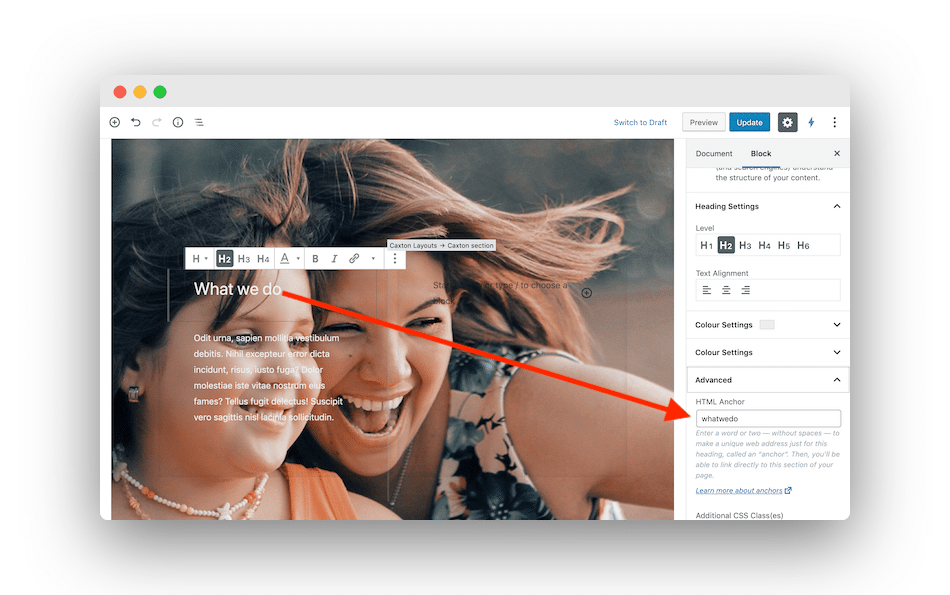
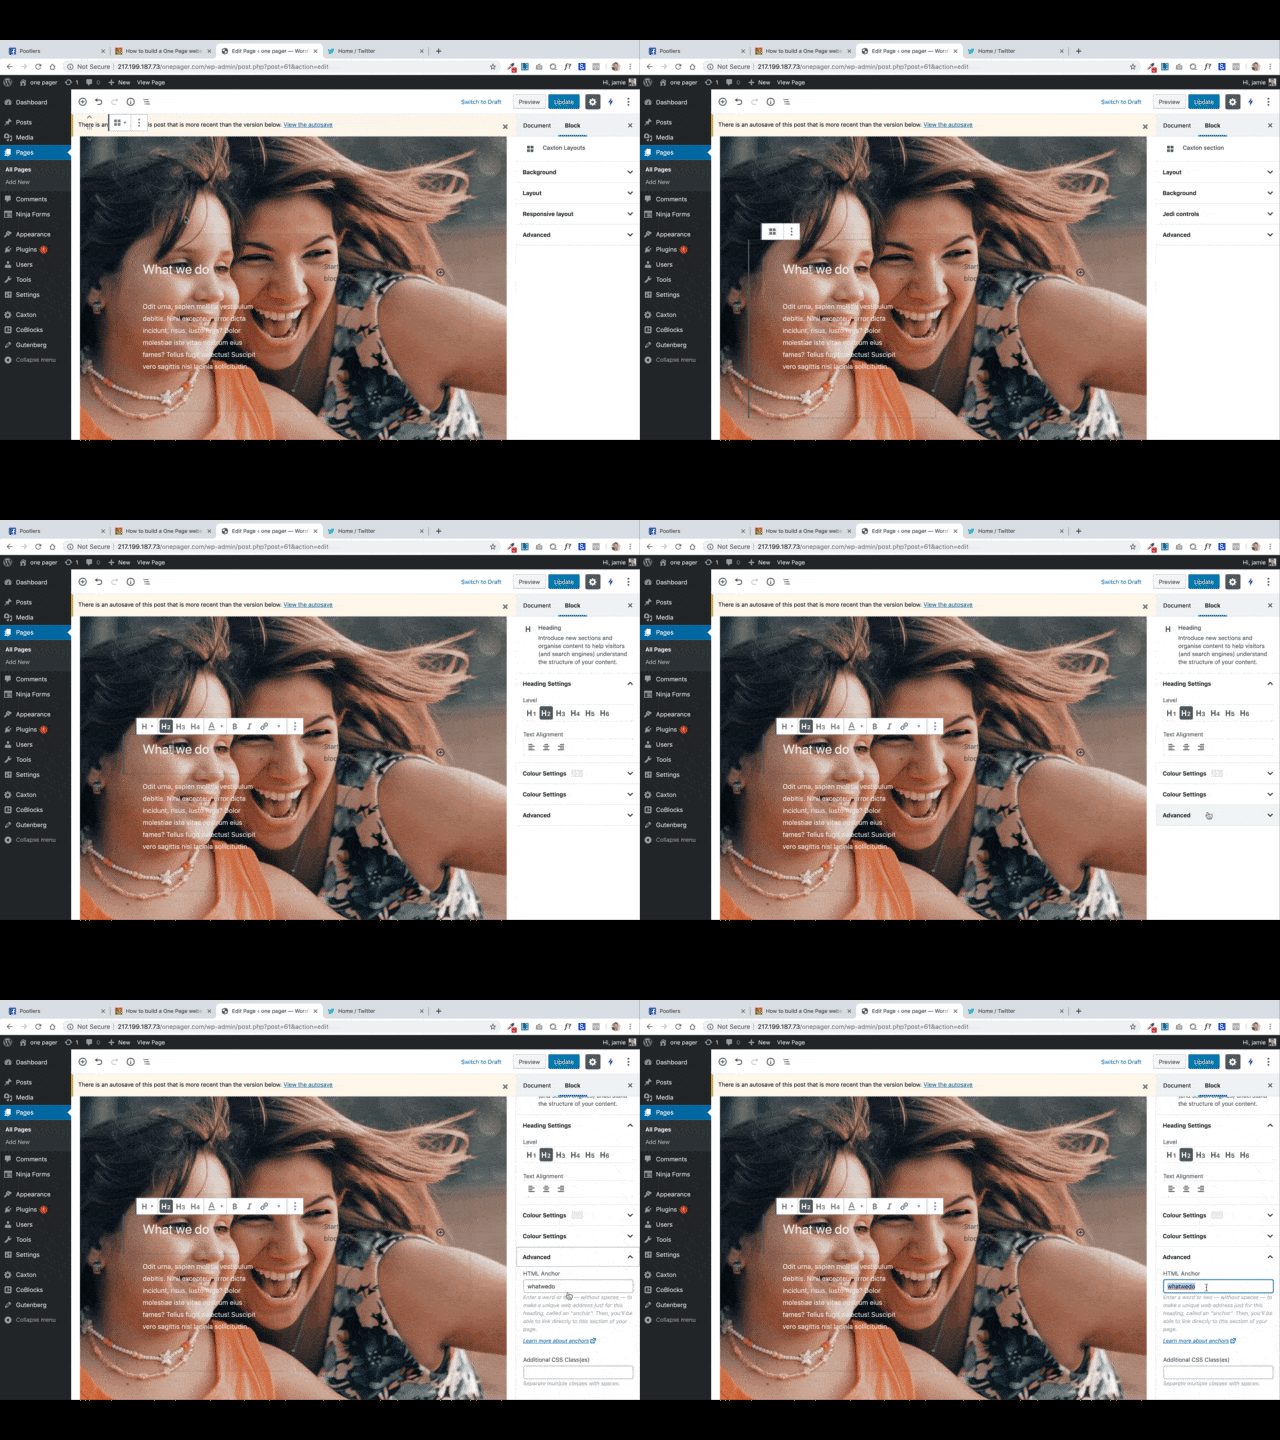
If you can’t see this option to start with?
Just click on your Heading and then over to the right and in the right hand panel you’ll an option that says
Advanced
Click on Advanced and the panel will open up and you’ll see the Anchor option
Step 3 – Design and build your page sections with the Gutenberg Editor
Now you can design your sections using Gutenberg and any 3rd Party plugins.
In my demo site the main plugins I used to design my page were
Caxton – https://wordpress.org/plugins/caxton/
Caxton was used for the Parallax Sections and also to add Shape Dividers with the pages
CoBlocks – https://wordpress.org/plugins/coblocks/
CoBlocks was used for the FAQ accordion section
Ultimate Addons for Gutenberg – https://wordpress.org/plugins/ultimate-addons-for-gutenberg/
Ultimate Addons was used for the Top Hero section of the Page. I used the container Block because it lets you add a negative margin to the top. I need this so that the top image would site behind the Astra menu.
Step 4 – Create your menu links
Finally you need to create your menu links.
Your menu will link to the sections within your page.
You need to use the Custom Links panel found in Menus.
Create a custom link menu item.
To link to the section add # followed by your Anchor name
In my example below, my Anchor was named faq.
So in URL I put
#faq
And in the Link text I put
faq
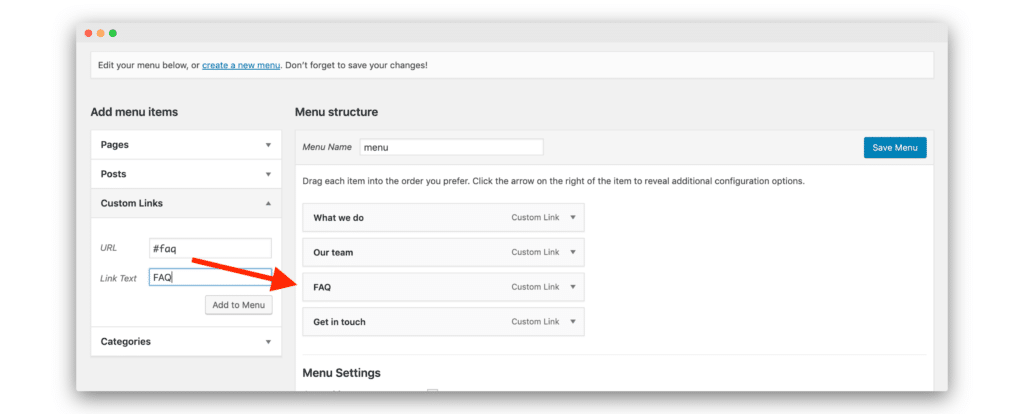
Then just repeat for all your other sections 🙂
Conclusion
So that’s how you can create an One Page website using just the Gutenberg Editor.
The most important things to remember are
- Headings created using Gutenberg now automatically have an option where you can add an HTML anchor
- Use the custom link Menu item to add links to your Anchors
- Use the convention #myanchorname in the URL field for your Custom Menu Item
- Use the Page Scroll to Id WordPress plugin to create a smooth scrolling effect
I hope you found it really useful.
If you have any comments or questions, please leave them in the comments below.
Thanks for taking the time to Pootle 🙂
Jamie
Leave a Reply